
Problems and Solutions


Legal Notice
The author takes no responsibility for any harm that may be caused by the use or misuse of the information contained in this site or by the use or misuse of any materials, formulas, recipes, techniques or processes in this site.
Leaking Oil Paint Tube
Due to Crimp, Crack, or Puncture
The problem:
Most artists have encountered problems with a paint tube during some point in their career. Typically the problems are either due to a stuck cap or with a leaking tube. Sometimes the leaking tube is a result of trying to forcefully remove a stuck cap by holding on to the tube body with one hand and twisting the cap with the other. The outcome is often a twisted tube body and sometimes a tear in the sides of the body. In other cases cracks and leaks can occur while rolling the tube up or folding the tube to dispense paint. The third case is a puncture usually encountered during transport to or from class.
In each case the opening in the tube is allowing air to oxidize exposed paint and thus drying it in the tube. As the oxidation continues to occur away from the opening the paint will continue to thicken and dry, finally ruining the paint in the tube.
In all cases, it's my recommendation to transfer the paint to a new tube. The expense is generally less than two dollars and it only takes about 5 minutes or less. It's very easy, I'll show you how.
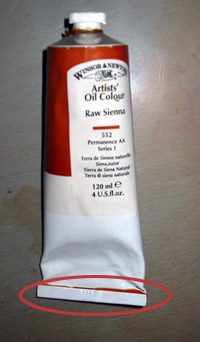
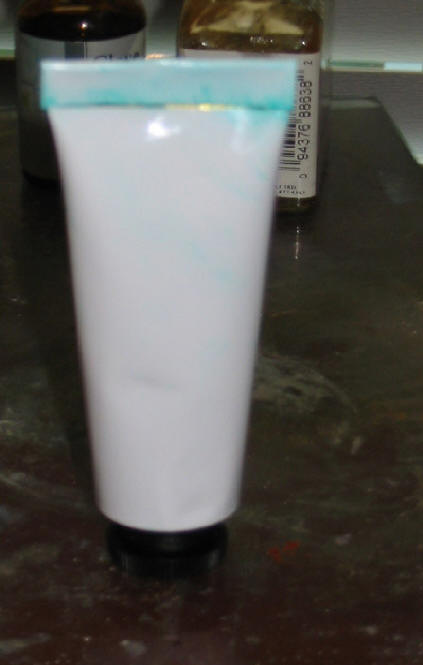
First, however, I want to make sure that we really have a leaking tube of paint. When oil paints are loaded into tubes they sometimes experience a release in oil, especially in paints where the pigments require a high ratio of oil to pigment. Most often this is exhibited by a fine line of dried linseed oil at the end of the tube where it has been crimped, as seen below in the red circle.
This is normal and there is nothing wrong with this tube. In fact, notice that the oil is beyond the factory crimp.
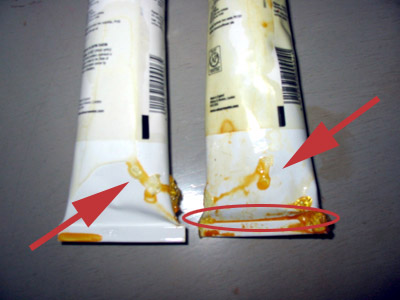
Another example shows what might be mistaken as a punctured tube is actually just linseed oil from another tube (arrows). You can remove the dried linseed oil to see if it originates from a leaking from this tube or another. The tube on the left also shows excess oil at the end of the tube beyond the factory crimp (circle).
Once again, these tubes are fine and don't require any further attention.
The Solution:
So if your tube is actually leaking or punctured we need to transfer the paint to a new tube. In my example the cap and neck are damaged.
Transferring the paint to a new tube is easy and cheap. As I said, the expense is generally less than two dollars and it only takes about 5 minutes or less.
What you'll need:
|
an empty tube of the appropriate size | |
|
a palette knife that will fit into the empty tube | |
|
a palette or glass plate | |
|
canvas pliers | |
|
permanent marker and/or label | |
|
Metal cutting shears | |
|
Gloves aren't a bad idea | |
|
paper towels (can never have too many) |
Empty tubes can be purchased at the local art store or from several on-line vendors. Ask me in class and I recommend a few. They come in several sizes, including the 37mL (1.5 Oz) and 120mL (4 Oz) sizes common to oil paints.
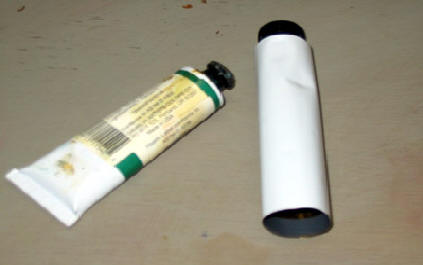
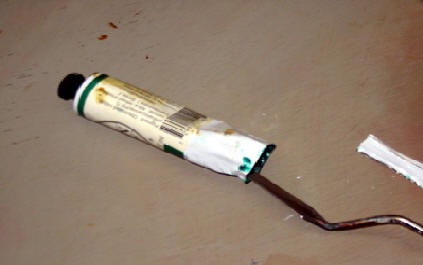
A leaking paint tube on the left with an empty tube on the right
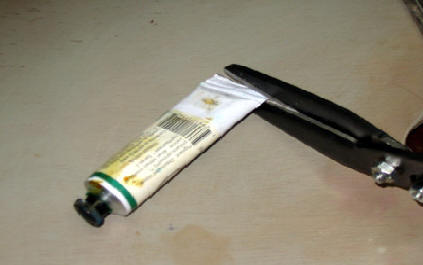
Step 1
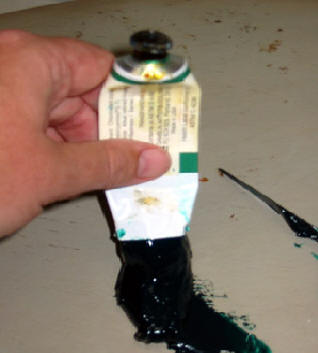
Unroll the bottom of the tube and squeeze the paint toward the top away from the crimp. Use metal shears to cut the bottom of the tube off above the factory crimp.
Step 2
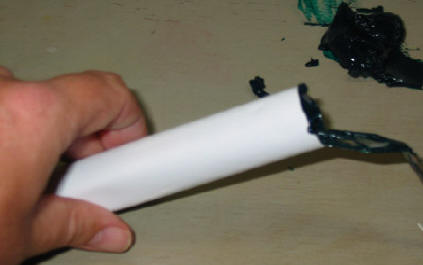
Use the palette knife to open the bottom of the tube.
Step 3
Squeeze out the paint from the tube onto the palette or glass plate. Try to get all of the paint out.
Step 4
Holding the empty tube cap down, you can start filling the empty tube with the paint using the palette knife.
As you fill the tube, stop and tap the cap end several times and then continue filling. To tap the cap end without damaging it, hold it in your fist so that the cap cannot hit the table and slam your fist down. Do this repeatedly until the paint has been transferred.

Step 5
After all of the paint has been loaded, use your fingers to squeeze the tube together where the paint ends. Wipe off the end with a paper towel to remove any excess paint. Either with your fingers or using the canvas pliers grip the end of the tube about 1/4 inch from the end and fold over twice ensuring that the crimp has sealed the tube.

Step 6
Now all you have to do is affix a label with the name of the paint printed or written on it.
See I told you it was easy!
- Marc
© 2007, Marc J. Surrency. Artist scans, images, and web design are protected by copyright. Physical or electronic reproduction in whole or part is unlawful without written permission of the artist.